Other Articles
- EC2 Volume – Enable EBS Encryption
- EC2 Volume – Enable EBS Volume Backup
- EFS – Enable EFS Storage Backup
- EC2 Instance – Enable Deletion Protection
- EC2 Instance – Monitor CPU Utilization
- ECS Service – Monitor CPU Utilization
- ECS Service – Monitor Memory Utilization
- EC2 VPC – Ensure Flow Logs are Enabled
- S3 Bucket – Block S3 Bucket Public Access
- S3 Bucket – Enable S3 Bucket Versioning
- S3 Bucket – Enable S3 Bucket Encryption
- RDS DB Instance – Enable Auto Minor Version Upgrade
- RDS DB Instance – Monitor Free Storage Space
- RDS DB Instance – Monitor CPU Utilization
- RDS DB Instance – Encryption of Storage
- RDS DB Instance – Enable Deletion Protection
- SQS Queue – Monitor Message Age
- SQS Queue – Monitor Message Visibility
- DynamoDB Table – Enable Table Encryption
- DynamoDB Table – Enable Table Point In Time Recovery
- DynamoDB Table – Enable Table Deletion Protection
- DynamoDB Table – Monitor Table Read Capacity
- DynamoDB Table – Monitor Table Write Capacity
- DynamoDB Table – Monitor Table Latency
- Enable User MFA
- Enforce Key Rotation
- Enforce Active Key Limit
- Disable Unused User Credentials
- Enforce Group Permission
- Enable CloudTrail
- Enable AWS Security Hub
- Enforce Password Length
- Prohibit Password Reuse
- Purge Expired Certificates
- Check Root Access Keys Existence
- Enable Root MFA
- Establish Support Role
- Enable Key Rotation
- Encrypt CloudTrail Logs
- Enable GuardDuty
RDS DB Instance – Block Public Access
This check ensures that Amazon RDS database instances are not publicly accessible. Disabling public access reduces the attack surface and helps protect sensitive database data from unauthorized internet exposure.
Check Details
- Resource: RDS DB Instance
- Check: Block public access to RDS instance
- Risk: Publicly accessible databases may be exposed to unauthorized access
Remediation via AWS Console
-
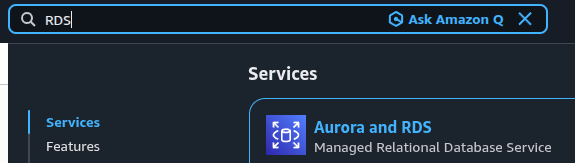
Log in to the AWS Management Console and open the
Amazon RDS console.
- From the navigation panel, click Databases.
- Select the RDS instance you want to update.
-
Click Modify from the top menu.

-
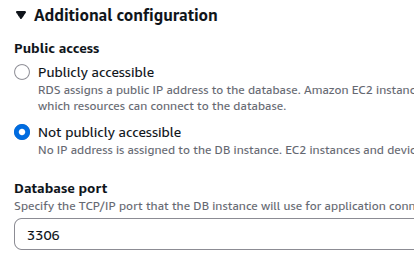
Scroll to the Connectivity section and expand
Additional connectivity configuration.
Set Publicly accessible to
No.
-
Update subnet and route configuration:
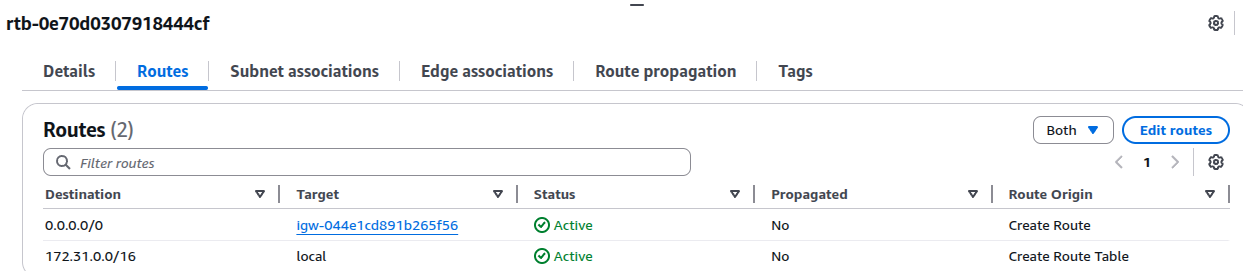
- Under Connectivity & security, click the VPC ID
- In the VPC page, open Details and click the Route table link

-
In the route table:
- Open the Routes tab
- Click Edit routes
- Remove or update any route with target igw-* (Internet Gateway)
- Click Save routes
- Return to the Modify DB Instance page. Click Continue, choose Apply immediately, and click Modify DB Instance.
- Repeat these steps for all RDS instances in the current region. Change the AWS region and repeat for other regions.
Remediation via AWS CLI
-
Log in to the AWS Management Console and click the
CloudShell icon (
>_) in the top-right corner.
-
View all RDS instances in a region:
aws rds describe-db-instances \ --region <region-name> \ --query 'DBInstances[*].DBInstanceIdentifier' -
Disable public access for the selected RDS instance:
aws rds modify-db-instance \
 --region <region-name> \
 --db-instance-identifier <db-instance-name> \
 --no-publicly-accessible \
 --apply-immediately
Note: Changes related to Internet Gateway removal and routing cannot be completed using AWS CLI. These updates must be performed manually through the AWS Management Console.
Repeat these steps for all RDS instances in the current region and across all AWS regions used by the account.