Other Articles
- How to Integrate Kawach with Asana?
- How to Integrate Kawach with Atlassian?
- How to Integrate Kawach with AWS?
- How to Integrate Kawach with GCP?
- How to Integrate Kawach with GitHub?
- How to Integrate Kawach with GitLab?
- How to Integrate Kawach with Google Workspace?
- How to Integrate Kawach with Linear?
- How to Integrate Kawach with Microsoft Entra ID?
- How to Integrate Kawach with Sentry?
- How to Integrate Kawach with Slack?
- Why Integrate with Identity and Workspace Tools?
- How to Integrate Kawach with Vercel?
How to integrate Kawach with Supabase?

Overview
This article explains how to integrate Supabase with Kawach to enable centralized compliance monitoring across your Supabase environment. Once connected, Kawach can monitor your Supabase Organization in read-only mode and surface relevant findings as part of your compliance and risk workflows.
Prerequisites
Before starting the integration, ensure the following:
- Your organization has an active Supabase account.
- You have access to the Supabase Organization you want Kawach to monitor.
- You have sufficient privileges within the Supabase organization to authorize third-party applications.
- You have access to your organization's Kawach account with permissions to manage integrations.
What Kawach Accesses
Once connected, Kawach can:
- Read Supabase organization information
- Access organization-level data with Organizations: Read permission scope
- Monitor organization membership and access-related signals relevant to compliance and operational risk
Your Supabase projects and database configurations remain unchanged during monitoring.
Steps to Integrate Supabase with Kawach
Step 1: Navigate to Integrations in Kawach
- Log in to your Kawach account.
- Go to the Integrations tab.
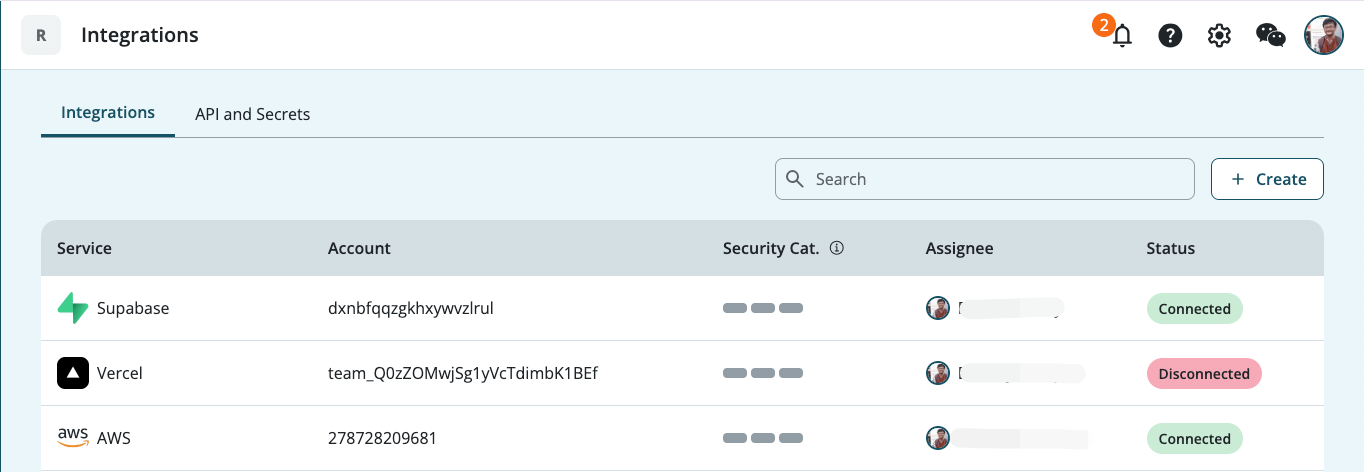
- Click Create.
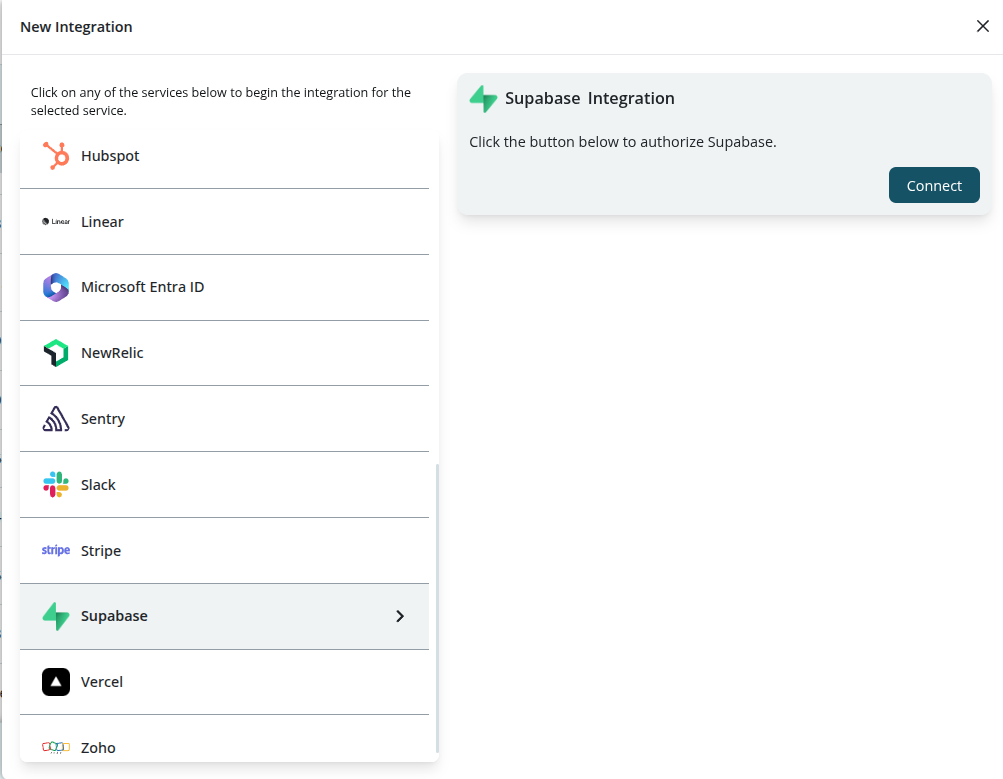
- Locate Supabase from the list of available integrations.
- Click Connect.
Step 2: Authorize Kawach in Supabase
- You will be redirected to the Supabase authorization page.
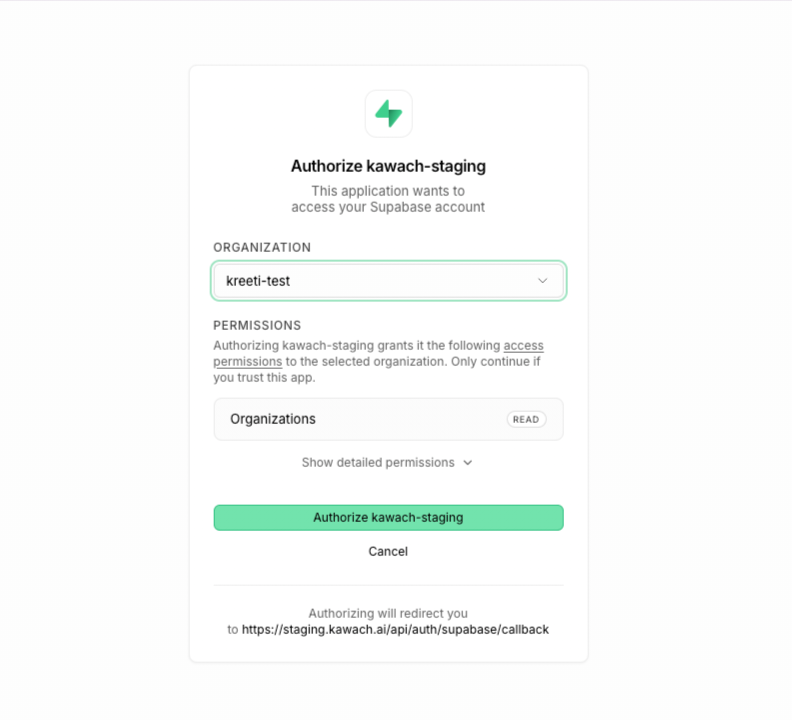
- Select the Organization you want Kawach to access from the dropdown.
- Review the requested permissions. Kawach requests Organizations: Read access. Click Show detailed permissions to review the full scope.
- Click Authorize kawach-staging to grant access.
Step 3: Confirm Integration
After authorization:
- You will be redirected back to Kawach automatically.
- The Supabase integration will appear under Integrations with a
Connected status.
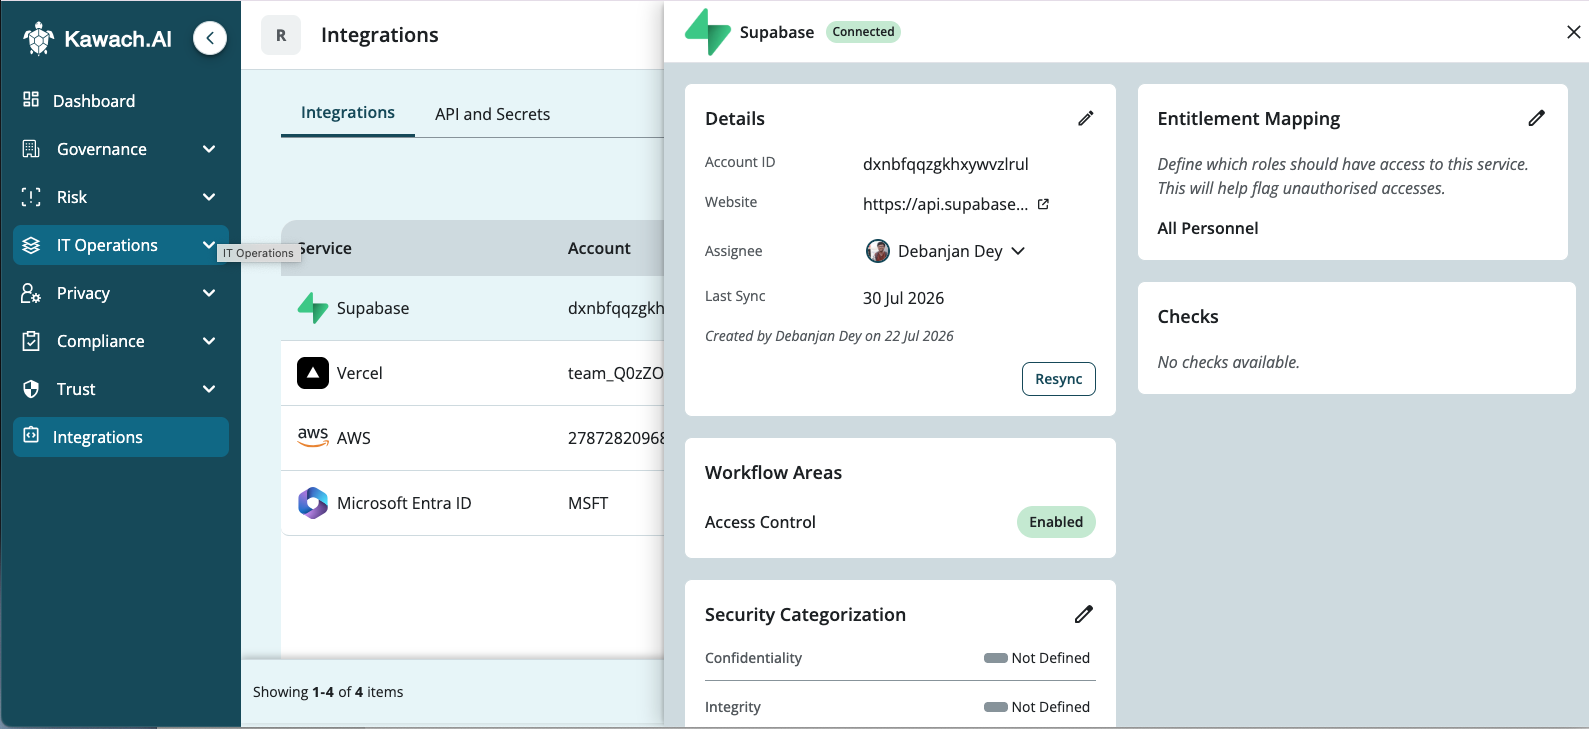
- Kawach will begin syncing organization details, including Account ID, users (service accounts) & sync timestamps.
After the Integration
Once the integration is complete:
- The Supabase account is visible in Kawach.
- You can assign an owner to the integration and resync data manually at any time using the Resync option.
- Workflow areas such as Access Control can be enabled for the integration.
- Entitlement mapping can be configured to define which roles should have access to this service, helping flag unauthorized access.
- Teams get centralized visibility into their Supabase organization without switching tools.
This setup supports ongoing compliance by ensuring database and access-related evidence is consistently available.
Troubleshooting
-
Authorization failed
Ensure you are signing in with the correct Supabase organization account and have sufficient privileges to authorize third-party applications.
-
Organization not visible
Verify that you selected the correct organization from the dropdown during authorization.
-
Data not syncing
Allow a few minutes after setup. Use the Resync option, or try reconnecting the integration if issues persist.
Updated on 30 July, 2026