Other Articles
- How to integrate Kawach with Asana?
- How to integrate Kawach with Atlassian?
- How to integrate Kawach with GCP?
- How to integrate Kawach with Github?
- How to integrate Kawach with Gitlab?
- How to integrate Kawach with Google Workspace?
- How to integrate Kawach with Linear?
- How to integrate Kawach with Microsoft Entra ID?
- How to integrate Kawach with Sentry?
- How to integrate Kawach with Slack?
- Why Integrate with Identity and Workspace Tools?
How to integrate Kawach with AWS?
Support > AWS Integration
January 08, 2026
Overview
This article explains how to integrate AWS with Kawach to enable centralized compliance monitoring across your AWS environment. Once connected, Kawach can monitor AWS resources in read-only mode and surface relevant findings as part of your compliance and risk workflows.
This integration helps ensure that cloud infrastructure configurations, access controls, and operational signals are consistently tracked and available for audits, reviews, and internal assessments.
Prerequisites
Before starting the integration, ensure the following:
- Your organization has an active AWS account.
- You have access to the AWS IAM console with permissions to create IAM roles.
- An AWS account admin is available to approve the connection.
- You have access to your organization’s Kawach account with permissions to manage integrations.
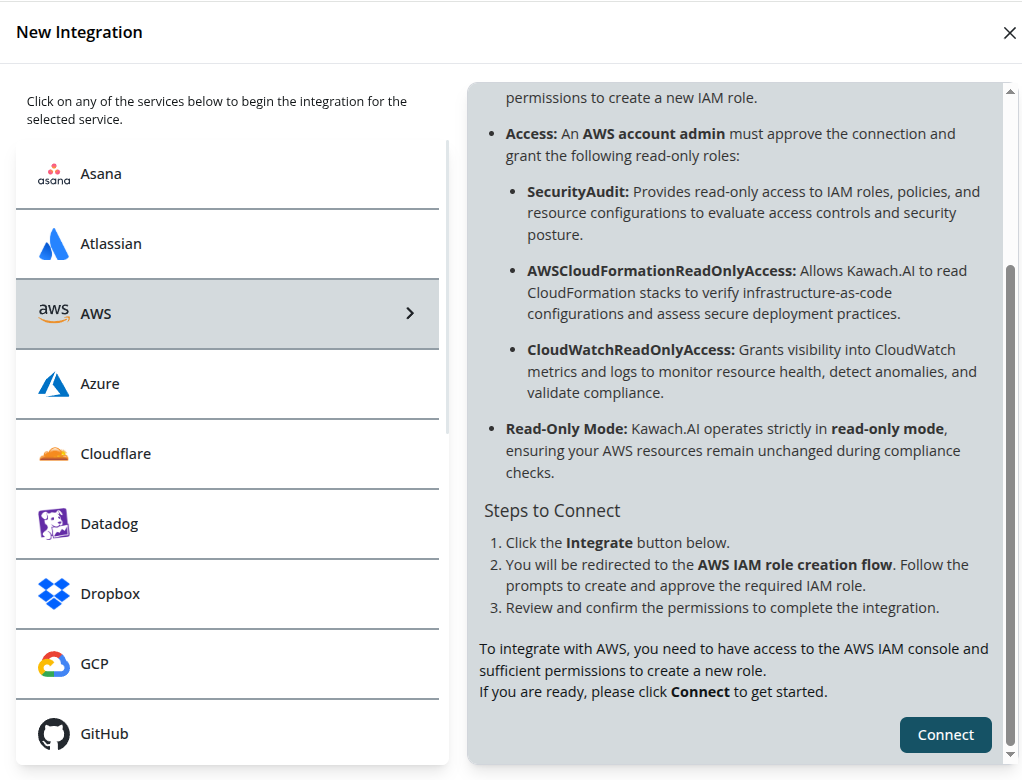
What Kawach Accesses
Once connected, Kawach can:
- Read IAM roles, policies, and resource configurations
- Read CloudFormation stacks to assess infrastructure-as-code deployments
- Read CloudWatch metrics and logs to monitor resource health and detect anomalies relevant to compliance and operational risk
Steps to Integrate AWS with Kawach
Step 1: Navigate to Integrations in Kawach
- Log in to your Kawach account.
- Go to Settings.
- Select the Integrations Tab.
- Click Create.
- Locate AWS from the list of available integrations.
- Click Connect.
Step 2: Authorize Kawach in AWS
-
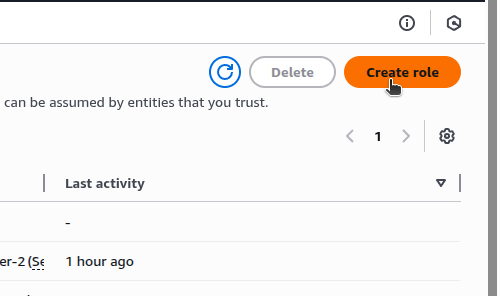
Go to the AWS IAM Centre.
-
Click "Create Role".
-
From Trusted entity types, select "AWS Account".
Select "Another AWS Account" and provide:
Account ID: 340752827223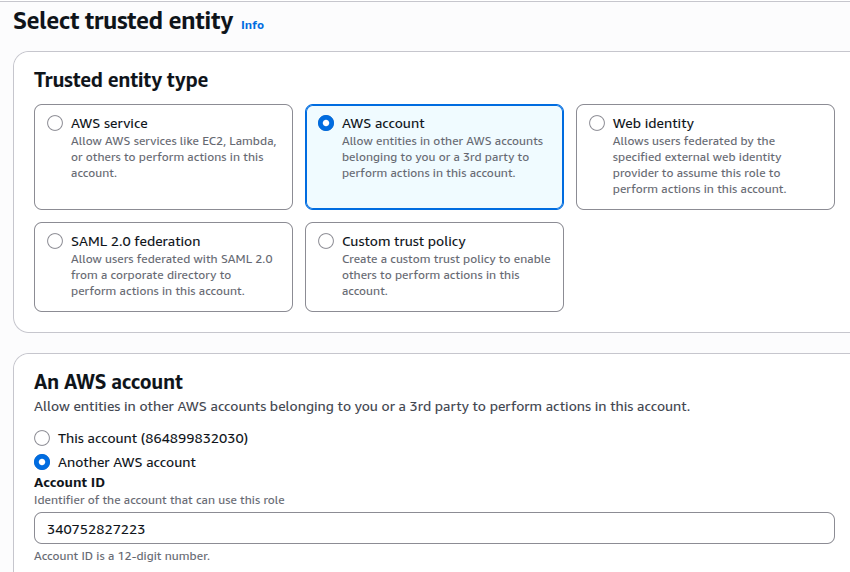
-
Select "Require external ID" and provide:
External ID: a1323834-d232-4c3f-b0a0-95cbd103e0e8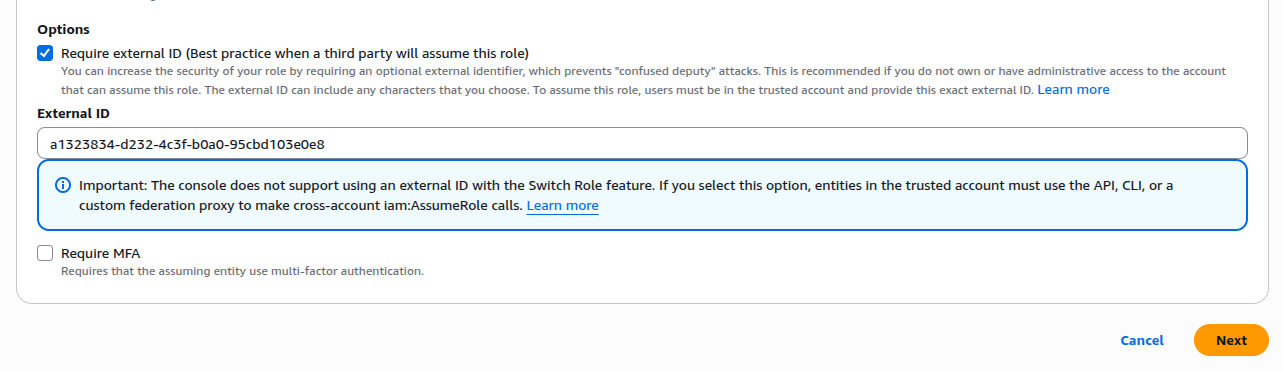
-
In the "Add Permission Policies" step, select the following:
- SecurityAudit
- AWSCloudFormationReadOnlyAccess
- CloudWatchFullAccessV2
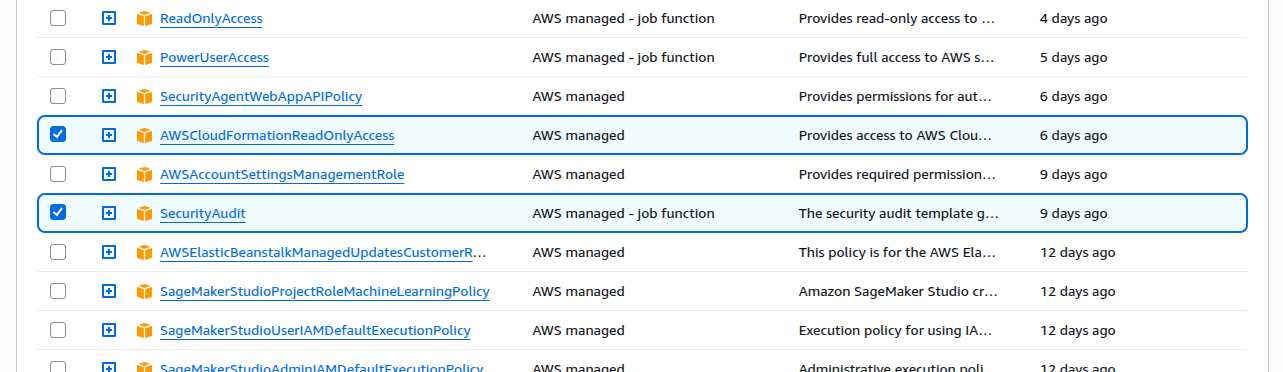
- Click "Next".
-
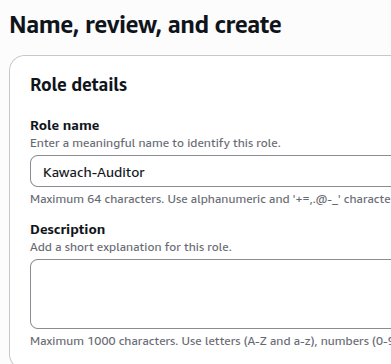
Provide the role name as Kawach-Auditor and click "Create Role".
-
Open Kawach-staging as admin → Go to Settings → Integrations.
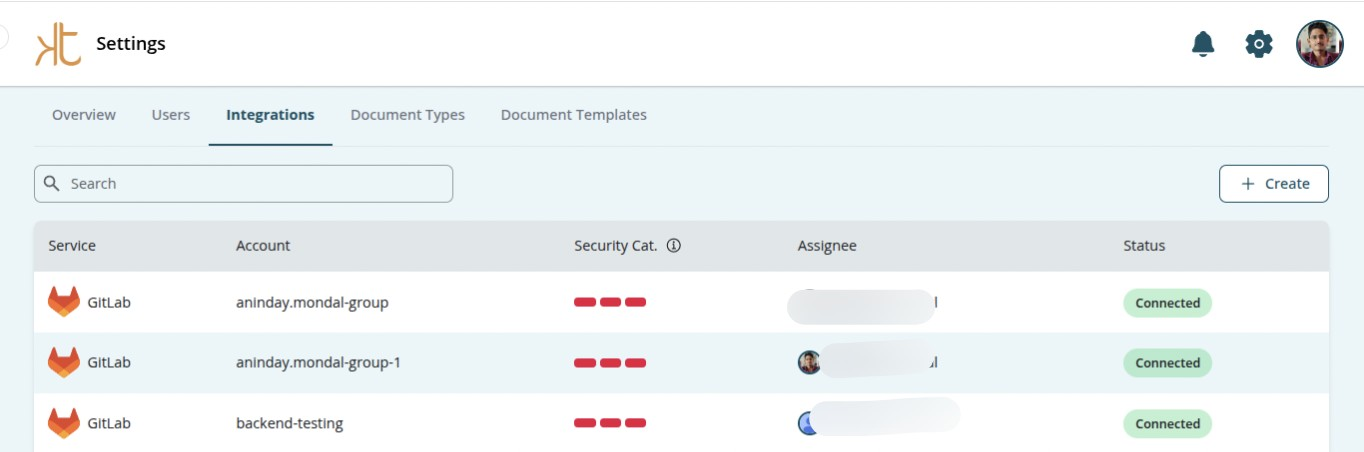
-
Click "+ Create" → Select AWS → Click Connect.
-
Provide the Role ARN as the Client Secret.
Provide your AWS Regions (comma-separated if multiple).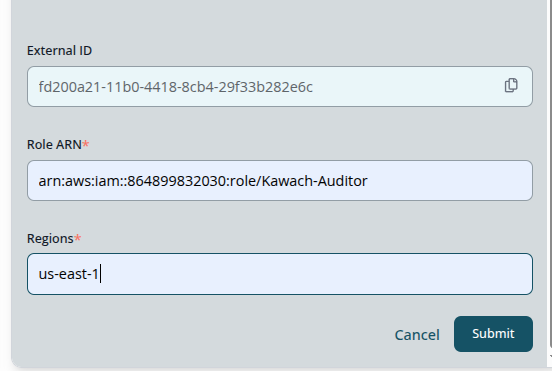
- Click "Submit".
Kawach will begin syncing data from your AWS account.
After the Integration
Once the integration is complete:
- AWS resources are continuously monitored within Kawach.
- Relevant findings can be surfaced as part of compliance workflows.
- Teams get centralized visibility across their cloud environment without switching tools.
This setup supports ongoing compliance by ensuring cloud infrastructure evidence is consistently available.
Troubleshooting
-
Authorization failed
Ensure you are logged into the correct AWS account and have permission to create IAM roles, with account admin approval.
-
Resources not visible
Verify that the IAM role includes all required read-only policies.
-
Data not syncing
Allow a few minutes after setup. If issues persist, try reconnecting the integration.