Other Articles
How to add employee details step by step?
Support > People Management
11 February, 2026
Adding employee details in Kawach is a foundational activity. Accurate employee data ensures proper role assignment, reporting hierarchy, compliance tracking, training allocation, workflow ownership, and audit readiness.
This guide explains the complete step-by-step process to add employee details correctly.
Step 1: Go to People → Personnel
- Log in to Kawach
- From the main menu, click on People
- Select Personnel
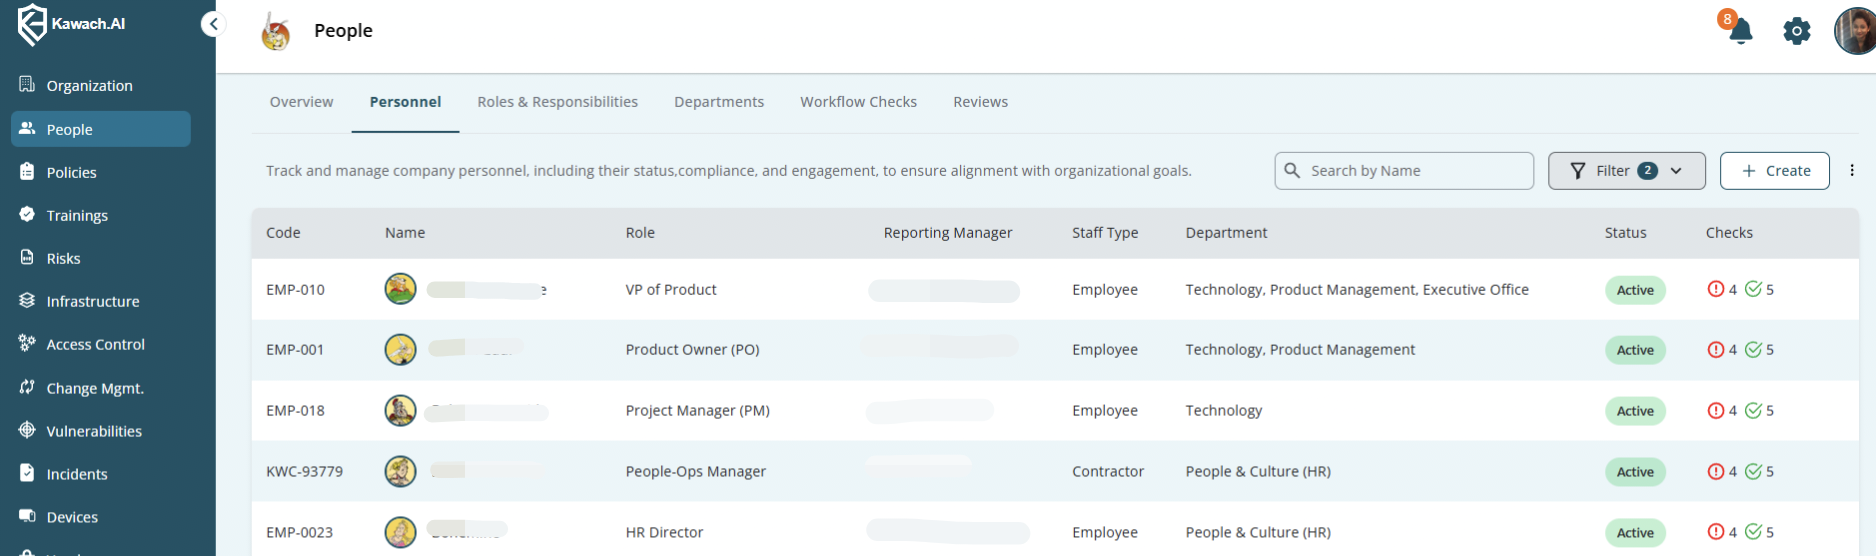
People → Personnel page showing the employee list with columns like Code, Name, Role, and Reporting Manager.
Step 2: Add a New Employee or Select an Existing Employee
- Click Add New Person to create a new employee record
- You can Add employee details manually one by one
- use the Bulk Upload option to add multiple employees at once
- You may also Select an existing employee from the list to view or update their details
OR
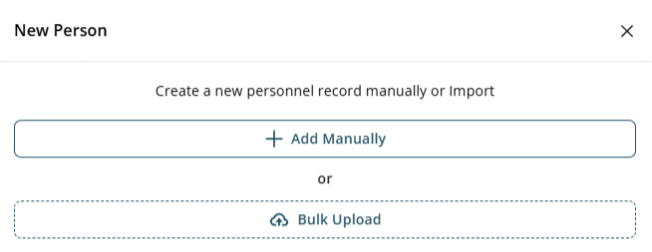
Add New Person button, Bulk Upload option, and manual add option.
Step 3: Fill in Basic Employee Details
Enter the required employee information:
- Employee Code
- Employee Name
- Official Email ID
- Type
- Role
- Date of Joining
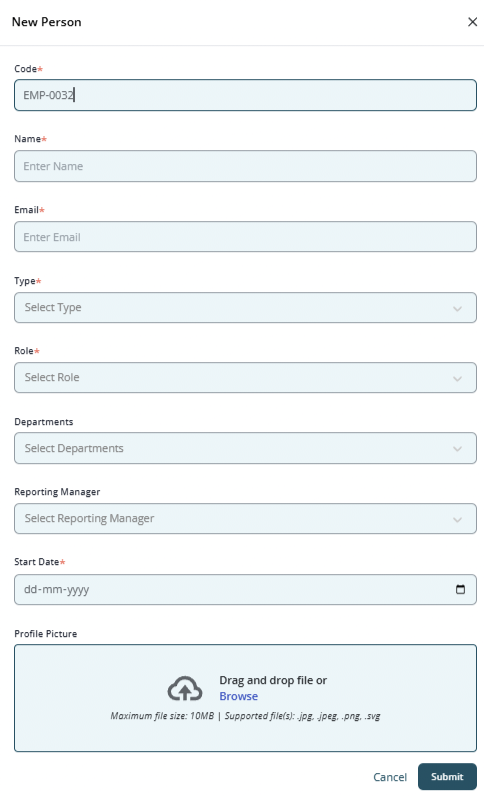
Employee details form showing fields for code, name, email, and joining date.
Step 4: Assign Role (Mandatory)
- Select the appropriate Role from the dropdown
- Role assignment is mandatory to save the employee details
⚠️ Without assigning a role, the system will not allow the record to be saved.
Step 5: Assign Reporting Manager
Select the appropriate Reporting Manager from the dropdown list.
This step is important because:
- It automatically updates the Organogram
- Establishes reporting hierarchy
- Ensures approval workflows are correctly routed
- Maintains proper governance structure
If no manager is assigned, the employee may not appear correctly in the reporting structure.
Step 6: Select Department (Optional)
Choose the appropriate Department from the dropdown list (e.g., HR, PMO, Engineering, Finance, IT).
Although optional in some cases, assigning a department is highly recommended because it:
- Helps structure the Organogram properly
- Enables department-wise reporting
- Supports training campaign allocation
- Allows filtered reporting in compliance dashboards
- Strengthens accountability within teams
Accurate department mapping improves visibility for leadership and simplifies internal audits.
Step 7: Specify Personnel Type and Status
Select Personnel Type
Choose whether the individual is:
- Employee
- Contractor
- Intern
- Out of Scope
This classification is important for:
- Access control management
- Contract tracking
- Compliance documentation
- Audit evidence
- Segregation of internal vs external personnel
Step 8: Submit Employee Details
Before submitting, carefully review the following:
- Full Name
- Official Email ID
- Department
- Personnel Type
- Date of Joining
- Assigned Role
- Assigned Supervisor
- Status
After verification, click Submit.
Once submitted:
- The employee profile becomes active in the system
- Organogram updates automatically
- Assigned permissions are applied
- Compliance tracking begins
- Activity is recorded in audit logs
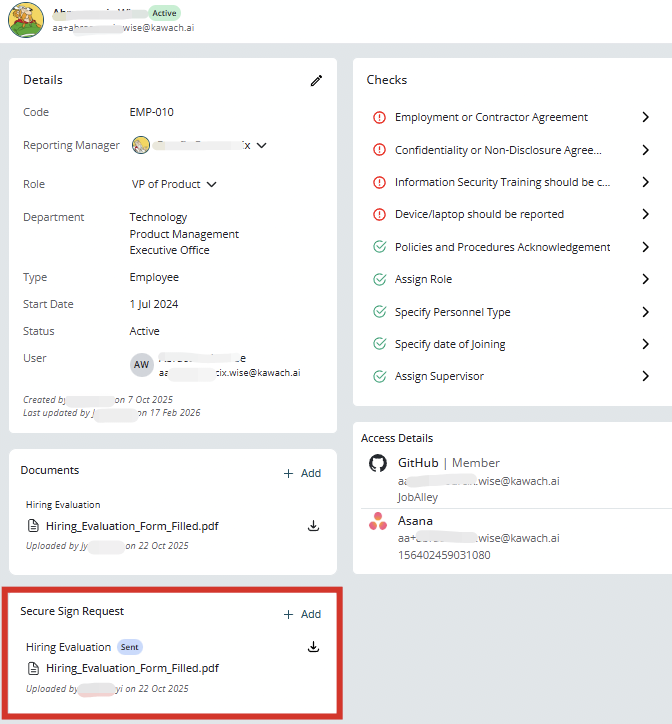
Step 9: Review Checks (Compliance Section)
Go to the Checks section on the right panel and review pending and completed compliance items such as:
- Confidentiality or Non-Disclosure Agreement
- Policies and Procedures Acknowledgement
- Device/laptop should be reported
- Employment or Contractor Agreement
- Information Security Training should be completed
- Specify Personnel Type
- Specify date of Joining
- Assign Role
- Assign Supervisor
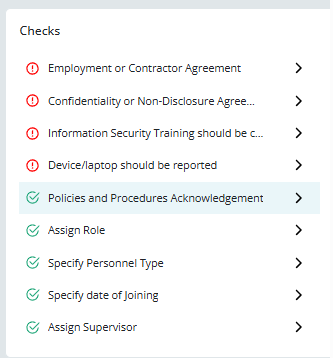
Checks panel showing completed (✔️) and pending items.
Why Reviewing Checks Is Critical
This step ensures:
- Proper onboarding compliance
- Legal documentation completion
- Security awareness confirmation
- Asset tracking accountability
- Audit readiness
- Risk mitigation from day one
Skipping this review may lead to:
- Incomplete onboarding documentation
- Policy non-compliance
- Security exposure
- Audit observations
Step 10: Upload Documents (Optional but Recommended)
After completing employee details and compliance checks, scroll to the Documents section within the employee profile.
Click on Add to upload relevant employee-related documents.
Documents You May Upload:
- Employment Agreement / Contractor Agreement
- Offer Letter
- NDA (Non-Disclosure Agreement)
- Identity Proof (as per company policy)
- Policy Acknowledgement Forms
- Training Completion Certificates
- Background Verification Documents
Why Uploading Documents Is Recommended
Although optional, uploading documents ensures:
- Centralized document storage
- Easy retrieval during audits
- Reduced dependency on emails or local folders
- Secure documentation management
- Clear evidence of onboarding compliance
All documents remain linked directly to the employee’s profile, improving traceability and accountability.
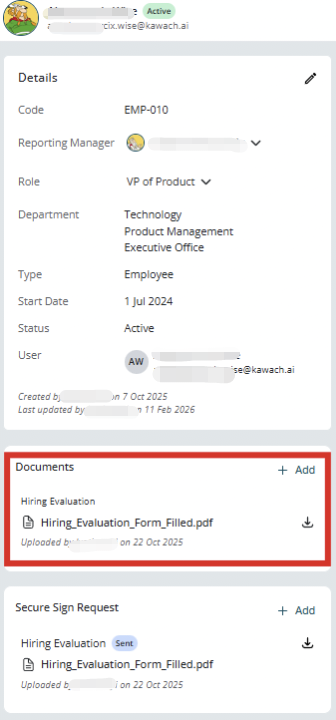
Documents section with the “Add” button visible.
Step 11: Send Secure Sign Request (If Required)
If any document requires employee acknowledgement or signature, use the Secure Sign Request feature.
This allows you to:
- Send documents digitally for signature
- Track signature status
- Maintain timestamped proof
- Avoid physical paperwork
- Ensure legally traceable acknowledgement
When to Use Secure Sign Request
Use this feature for:
- Employment or Contractor Agreements
- NDA acceptance
- Policy acknowledgements
- Compliance declarations
- Confidentiality commitments
Benefits of Secure Sign
- Faster onboarding process
- Paperless documentation
- Automated tracking
- Secure digital validation
- Audit-ready signature records
Conclusion
Adding employee details in Kawach is simple and structured when followed step by step. Each stage of the process is logically organized to ensure accurate data entry, proper access control, and complete compliance onboarding.